
♥♪ Heartbeat Issue 1.0.0
Electronics is a relatively new territory for me, having started tinkering with electronics in early 2012 (compared to designing software since 2001). Making the jump to manufacturing electronics is kind of like moving from designing static HTML websites to implementing a robust backend for a major international website:
Many processes evolve significantly as you scale up.
What works on a small soldering bench won’t work when you’re building 1600 physical manifestations of something, so it requires a whole new way of thinking about the process. As I learn these new skills I’ve decided to collect my thoughts and research in a central location so that others may hopefully follow my path and accelerate their own understanding.
This is the first issue of The Pixel Heartbeat.
Creating the Pixel Heart Pipeline
Issue 1.0.0: September 21st to October 3rd, 2014
This newsletter will outline progress of the new Pixel Heart in five major categories:
General Overview
Some basic definitions:
- PCB: Printed Circuit Board. I’ll use PCB and board interchangeably.
- IC: Integrated Circuit. I’ll use chip or IC.
- RGB: Red/Green/Blue.
- LED: Light Emitting Diode. I’ll almost always be referring to RGB LEDs, which technically have three individual LEDs in them, as single units.
PCB & Lighting
I’ve decided to manufacture 1600 pixel units with Worldsemi’s 12-lamp 5050 SMD board as the basis for the board. These boards have 12 individual RGB LEDs (12x more than the original Pixel Heart!) and are powered using an integrated circuit called the WS2811. This chip is one of the most common individually-addressable LED chips on the market, making it cheap and easy to source.
Diffusion
To diffuse the light I’ll be building a case made of a plastic compound that sits atop the PCB. Something like these guys on Alibaba, but less janky.
PCB Design
I’m using Eagle to design the schematics and diagrams that describe the electrical workings of the PCB.
I have never designed a PCB, so I had to learn a whole new ecosystem of jargon and software in order to design the PCBs for the new pixels. Xcode’s never seemed more beautiful than after playing around with Eagle for an afternoon.
Below are some of the resources I read through this week:
All via Sparkfun
- How to Read a Schematic
- Voltage Dividers
- Series and Parallel Circuits
- PCB Basics
- How to Solder: Through-hole Soldering
- How to Install and Setup Eagle
- Using Eagle: Schematic
- Using Eagle: Board Layout
- Integrated Circuits
- Electronics Assembly
- Designing PCBs: SMD Footprints
- Designing PCBs: Advanced SMD
The Designing PCBs series was instrumental in designing my first PCB for the WS2811 part that will be powering the individual pixel units.
I first designed a package for the SOP8 package that houses the WS2811 (datasheet).
The WS2811 chip looks like this:
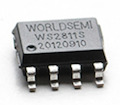
And this is what the chip’s SOP8 package looks like in Eagle:
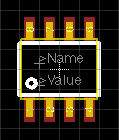
The package tells Eagle what the physical WS2811 looks like.
I then had to design the WS2811 symbol. The symbol looks like this:
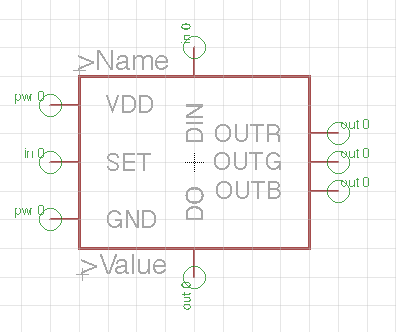
This, paired with the package, creates a “Device” in Eagle. I’m open sourcing these components in the Pixel Heart Eagle Libaries on Github.
From there I began duplicating the schematic from Worldsemi in order to fork their design and make the changes I need. The schematic’s pretty much finished:
![]()
This part was super fun! I even cleaned up on their original design a bit.
I’m now laying out the components on the board itself. This is what it looks like so far:
![]()
Chaos! I’ve still got to lay out all the wires and arrange the LEDs to optimally distribute the light for the cases I plan to design.
Open questions:
-
Why does each RGB color line need two transistors? Theory: this is to amplify the current in order to power 6 LEDs, but I don’t understand why it needs two and why they’re arranged the way that they are.
-
Why does the original schematic hint at a 5V power line? Theory 1: this is simply a typo. Theory 2: they’re actually somehow lowering the voltage to 5V. Theory 3: Something in the WS2811 is making the voltage 5V.
-
What will be the optimal LED arrangement? Theory: a concentric ring design should minimize hotspots. I can likely calculate lighting spread using maths.
-
Are 12 LEDs too much? Can I get away with just 6? This would greatly reduce the power load, wiring, and parts.
PCB Fabrication
Fabrication is the process of creating the sandwich of materials upon which all of the electronics will be soldered.
Fabricating PCBs is an entire step on its own because this is not something I can easily do myself at scale. Thus far I’ve looked into PCB fabrication houses and am likely going to go with PCBCart. I requested an estimate from them last week that came out to roughly $0.79/pcb - not too bad!
Once I have a satisfactory version of the PCB design I’ll look into getting a small batch of the boards made in order to test them out.
No major open questions here yet.
PCB Assembly
Assembly is the process of gathering all the electrical parts together and soldering them to the PCB.
A sub-step of assembly is parts sourcing. I’ll likely be getting most of the parts from Digikey. The only ones I can’t find off of Digikey are the WS2811 chips and the 5050 LEDs, but I’ve already found sources on Alibaba to get those parts for cheap (consider: I’m likely ordering over 18,000 LEDs). The 5050 LEDs source, and the WS2811 IC source.
I’m exploring two primary options for the assembly.
Option 1: Invest in a pick and place machine.
I’ve found two hobby pick and place machines thus far, the TM-240A ($5500) and the redFrog Pick and Place Machine ($3700).
Option 2: Get a company to assemble the parts.
I’m still waiting to get a quote back from ScreamingCircuits. At 1600 parts I’m past their upper bound for online quotes, but their estimate for 1000 boards comes in at $13,003.50, which blows away my budget. Assuming prices like these are normal then it’s likely that I’m going to invest in my own machine.
Option 3?
There is a third option of finding some means of manufacturing the PCBs in China, from PCB fabrication to assembly. This will involve working with Worldsemi in China and I may need to fly out there in order to make sure they understand what I’m trying to accomplish. I’ve already initiated contact with a Worldsemi rep on this but will be pursuing locally-sourced options first :)
Open questions:
- If I want to assemble the boards myself, what other tools and equipment will I need to invest in? I know that I’ll need to do something called “stenciling” in order to lay solder mask on the boards and then I’ll need to bake the boards in order to attach the parts to the board. This Sparkfun video is really insightful!
Plastic Molding
In order to create the case for the Pixel Heart pixels I have to create a mold. The mold defines the shape the plastic will form to by using a variety of methods that I’ll discuss in Plastic Manufacturing.
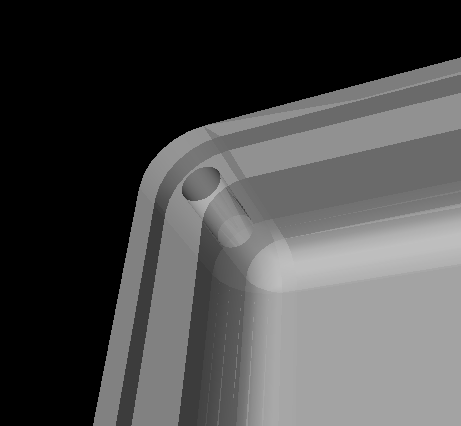
Both methods require that I design a 3D model of the mold. In order to do this I’ve had to learn how to use CAD software. My first attempt at this was with FreeCAD and it turned out ok.

Since designing this model I’ve learned about Rhino 3D. I haven’t played with it yet but it comes highly recommended so I will likely switch to it.
A friend has suggested that I do away with the screw holes in favor of using hot glue or a silicon gel to seal the PCBs to the case. This has the advantages of 1) not needing to screw 6400 screws and 2) being weather-proof - a super important aspect of having these pixels survive the playa and rain. I’ll likely go this route.
Once I’ve finalized the design I’ll need to make an injection mold. Doing this costs about $600 based on an estimate from hobbymolds.com. I could also try to do this myself by taking a CNC milling course and making the aluminum mold myself.
Open questions:
-
What is the optimal way to seat the PCB in the case? Is the “lip” that I’ve added to the first design a sensible way to do this?
-
How will I take into account the fact that the plastic is likely to shrink when it’s molded? This is super important for insuring that the PCB actually fits! If the PCBs end up being too small or big then I might have 1600 plastic cases that I can’t use.
-
How will I prototype the injection mold? If it costs $600 to make the mold then I’ll ideally want it to be perfect the first time (super unlikely!).
Plastic Manufacturing
Creating 1600 plastic cases is somewhat of a tough challenge.
There are two methods I’m currently aware of: Plastic Injection and Thermoforming.
Plastic Injection
hobbymolds has given me an estimate of $1.50/part + materials and shipping, so about $3000 in total.
Alternatively, I’ve looked into purchasing my own injection molder. Medium Machinery has one for $3000. They’re out of stock right now, but it might be a reasonable avenue given the price.
For the actual material of the cases I plan to use this polycarbonate plastic compound. It melts at 600 degrees Fahrenheit, which is perfect for the Medium Machinery machine. The spec sheet also says that it takes 4 hours for the plastic to dry - this could be incredibly problematic if I only have one machine. Assuming I were making the molds constantly, 24 hours a day, it would take 266 days to make the 1600 cases I need.
Thermoforming
I don’t know much about this process yet other than that it allows much higher yields. The reason for this is that you make a bunch of plastic molds simultaneously in a single sheet and then cut the pieces out. This process will likely involve working with a factory in some sense.
Open questions:
-
Is plastic injection molding an unreasonable way to make this many parts?
-
Can I use thermoforming to work with the diffusion compound that I’m interested in?
-
Are there alternative compounds that provide an equivalent level of diffusion? Notably: the leds are only going to be a few mm from the case itself, so the diffusion compound needs to be really good.
Closing Thoughts
I’ve been absorbing a shit ton over the past two weeks since I started the ball rolling on Pixel Heart v2. I’m sure that I’m wrong about a lot of the above and a lot of things will change.
Some general open questions:
-
How will I connect the PCBs to one another? What sort of connector should I use?
-
What mechanisms can be used to attach pixels to one another? I’d love to be able to, say, wrap the pixels around a surface, or have some distance between any two pixels.
-
What mechanisms can be used to hold the pixels up a-la Pixel Heart v1 (12x8’ of beating hearts and swirling colors)?
-
How will I power this setup?
-
How will I control the lights? Likely going to use some form of DMX controllers.
-
And whatever else I might be forgetting :)
Current estimate on v2 completion: maybe by next burning man, we’ll see!
Thanks for reading, hope you learned something new!
♥beats